THE BLONDE WHO BAKES
  • HOME
  • SHOP
  • MENU
  • CATERING
  • CLASSES
  • RECIPES
  • Hi, Im Whitney
  • CONTACT US

Double Chocolate Crinkle Cookies

12/20/2023

1 Comment

 
It’s that time of year when my oven is working overtime, baking all the yummy treats for the holidays. And these cookies are always on the list. I am a chocolate lover, and so Crinkle Cookies have always been one of my favorites.
To make these cookies even more delicious, I add my delicious Semi Sweet Chocolate Ganache, and Candy Cane buttercream frosting. Once I have frosted the cookies, I sprinkle them with crushed candy canes.
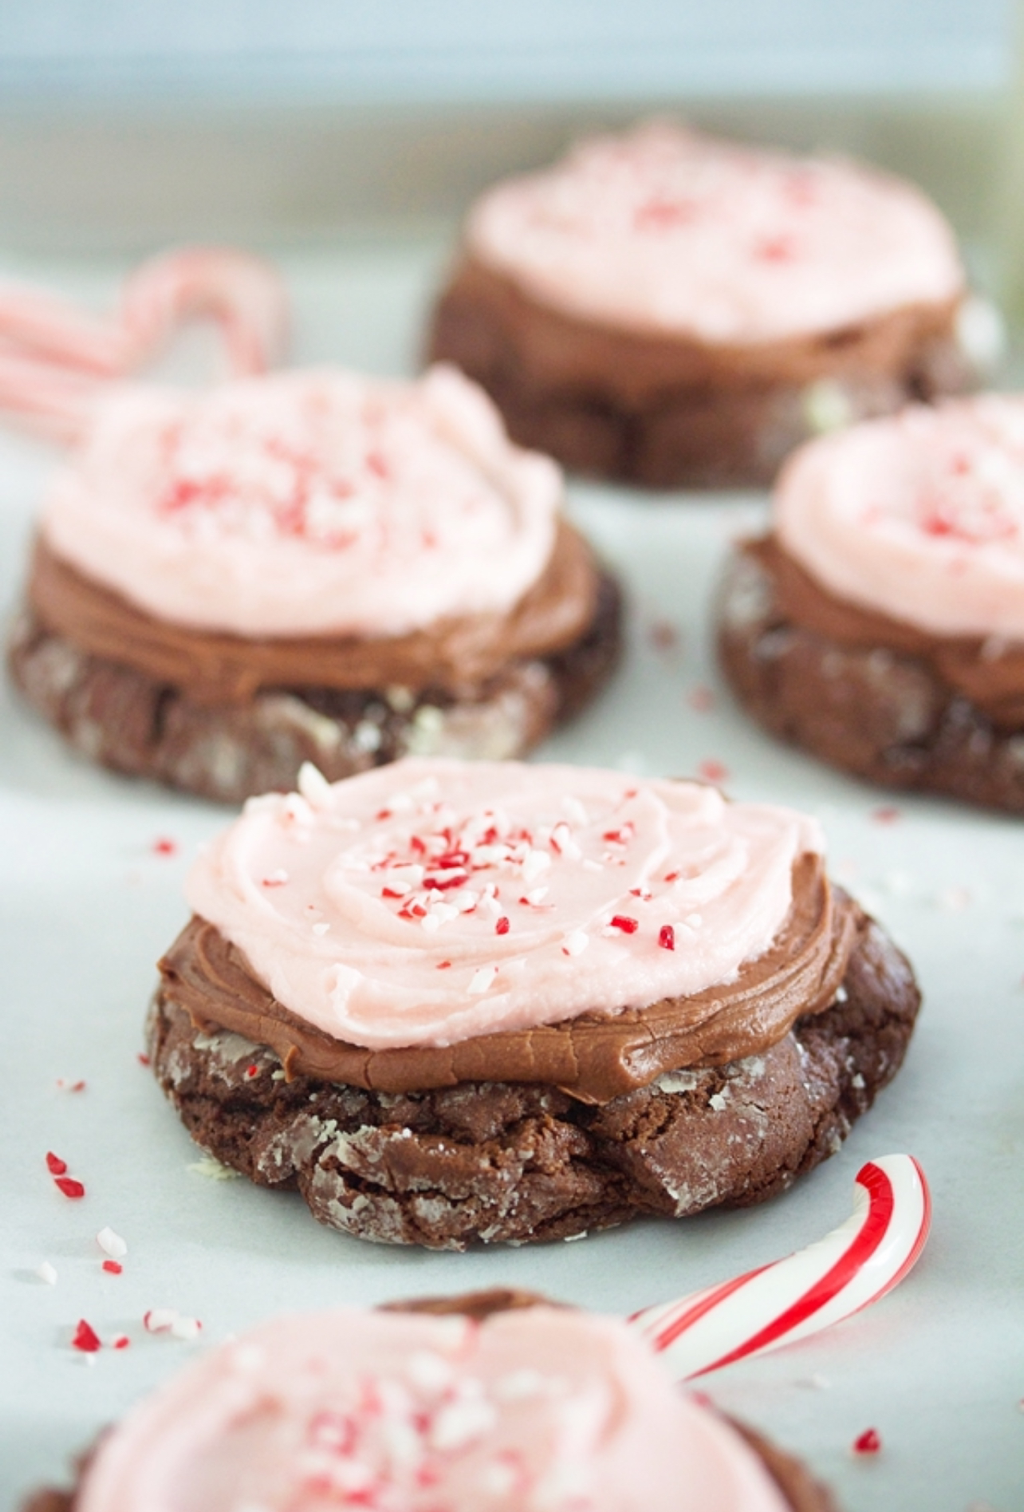
Picture

Ingredients:

  • 1/2 cup (1 stick; 115g) unsalted butter, softened.
  • 1/2 cup (100g) granulated sugar
  • 1/2 cup (100g) packed light or dark brown sugar
  • 1 large egg, at room temperature
  • 1 teaspoon pure vanilla extract
  • 1 cup (125g) all-purpose flour
  • 1/2 cup + 2 Tablespoons (51g) unsweetened natural cocoa powder
  • 1 teaspoon baking soda
  • 1/8 teaspoon salt
  • 1 cup (180g) mini or regular size semi-sweet chocolate chips


ROLLING
3 Tablespoons (35g)
granulated sugar

1 cup (120g) confectioners’ sugar, for rolling

Instructions:

  1. In a large mixing bowl beat the butter, granulated sugar, and brown sugar together on medium high speed until fluffy and light in color, about 2-3 minutes. Add the egg and vanilla extract, and then beat on high speed until combined. Scrape down the sides and bottom of the bowl as needed.
  2. In a separate bowl, whisk the flour, cocoa powder, baking soda, and salt together until combined. With the mixer running on low speed, slowly pour into the wet ingredients. Beat on low until combined and then beat in the chocolate chips. The cookie dough will be thick and very sticky. Cover dough tightly and chill in the refrigerator for at least 3 hours and up to 3 days. Chilling is mandatory for this sticky cookie dough.
  3. Remove cookie dough from the refrigerator and allow to sit at room temperature for 10 minutes. If the cookie dough chilled longer than 3 hours, let it sit at room temperature for about 20 minutes. This makes the chilled cookie dough easier to scoop and roll.
  4. Preheat oven to 350°F (177°C). Line large baking sheets with parchment paper or silicone baking mats. Set aside.
  5. Scoop and roll balls of dough, about 1.5 Tablespoons of dough each, into balls. Roll each ball very lightly in granulated sugar, then generously in the confectioners’ sugar. Place 3 inches apart on the baking sheets.
  6. Bake the cookies for 9-11 minutes or until the edges appear set and the centers still look soft.
    ​
    Tip: If they aren’t really spreading by minute 9, remove them from the oven and lightly bang the baking sheet on the counter 2-3x. This helps initiate that spread. Return to the oven to continue baking.
  7. Cool cookies for 5 minutes on the baking sheet, and then transfer to a cooling rack to cool completely. The cookies will slightly deflate as they cool.
  8. Cookies stay fresh covered at room temperature for up to 1 week.


Candy Cane Buttercream

Ingredients:

2 Cups Unsalted Butter. Room Temperature
7-8 Cups Powdered Sugar
1/2 tsp CLEAR Vanilla Extract
1 tsp Peppermint Extract
1/2-1 Cup Heavy Cream

1/3 Cup Crushed Candy Canes (Optional)
2-3 drops of Pink Food Coloring

Instructions:

  1. In a stand mixer, use your paddle attachment and cream your butter. Mix on medium/high speed for 2-3 minutes. Or until silky and creamy. (There should be no clumps. If there is, mix for longer on high speed.)
  2. Turn mixer down to low speed and add in your vanilla and peppermint extracts. Mix for 1 minute.
  3. While your mixer is on the lowest speed, Add in your full measurement of Powdered sugar. Mix for 1 minute on low.
  4. Add in your heavy cream in small 1/4 cup increments. After 1-2 measurements of cream, the powdered sugar should start incorporating. Once it does, turn mixer speed up to medium high speed. Continue to add in small increments of cream until you’ve reached your desired frosting consistency. Mix for 3-5 minutes.
  5. Once fully mixed, take off stand mixer and mix your frosting with a wooden spoon and get out any extra air pockets and create a smooth creamy finish.
    ​
  6. If you choose to add the crushed candy canes to the frosting, now is the time to do so. Mix them in by hand.


​

Chocolate Ganache
Ingredients:

1 Cup Heavy Cream
1.5 Cups Semi Sweet Chocolate
1 Tsp Vanilla extract

​

Instructions:

1. Boil the Heavy Cream in a small sauce pan
2. Once boiling, remove from heat.
3. Put your chocolate In a heat safe bowl or glass measuring cup.
4. Pour the hot heavy cream over the chocolate.
5. Mix until fully incorporated. (Should take 3-5 minutes).
1 Comment
Michele
2/25/2024 07:37:21 pm

Does this ganache stay spreadable?
Is it for drip with the amounts or for filling?

Reply


Leave a Reply.

    Hi, Im Whitney Berge

    Aka, The Blonde who Bakes,
    I am a wife and mom of 3, and a self- taught baker. I did not attend any formal culinary training, but I believe that nothing compares to learning as you go.
    Being in the kitchen baking is something that has always been special to me, and I knew that I could use my business knowledge as well as my baking experience to bless others with some delicious desserts, but also teach them that they can do it as well.
    About 15 years ago, I made the decision to not continue in my schooling for Sports Medicine and jumped in to selling my cakes and desserts.
    My clientele grew steadily, and I had some very loyal customers. So I made the decision to open up a brick and mortar bakery. 
    a few years into the bakery, I had my first child. Though it was difficult trying to navigate being a new mom and business owner, I pushed though and continued with my dream. 3 months later, I had a very big surprise that I was pregnant again with baby boy #2. This is when I had to re-evaluate and make the hard decision to close my bakery. Little did I know, that was the best decision I could have ever made. 

    1 year after closing my bakery doors, I wanted to get back to my passion for baking 
    I knew that I needed to change my business strategy because I wanted to be at home with my 2 boys, yet still be able to be Whitney and continue to grow as an entrepreneur. After many long nights of trying to figure out how I could change my business structure yet do what I love.
    I knew that I still wanted to bake desserts for people, but I wanted to focus a lot more of my energy on teaching others how to bake and create delicious and beautiful things. 

    ​And that my friends, is when The Blonde who Bakes came to be. 

    Archives

    February 2025
    November 2024
    March 2024
    February 2024
    December 2023
    November 2023
    October 2023
    September 2023
    May 2023
    April 2023
    March 2023
    January 2023
    October 2022
    March 2022
    October 2021
    September 2021
    August 2021
    July 2021
    March 2021
    February 2021

    Categories

    All
    Cookies

    RSS Feed

THE BLONDE WHO BAKES


Proudly powered by Weebly
  • HOME
  • SHOP
  • MENU
  • CATERING
  • CLASSES
  • RECIPES
  • Hi, Im Whitney
  • CONTACT US