THE BLONDE WHO BAKES
  • HOME
  • SHOP
  • MENU
  • CATERING
  • CLASSES
  • RECIPES
  • Hi, Im Whitney
  • CONTACT US

Triple Chocolate Mousse Cake

10/17/2022

6 Comments

 
Picture

Ingredients:

2 1/2 cups All Purpose Flour
2 1/2 teaspoons of Baking Powder
1/2 teaspoon of Baking Soda
1 cup Cocoa Powder (I love the Ghirardelli Cocoa)
1 teaspoon Salt
1/2 cup Vegetable oil
2 cups Granulated Sugar
3 large Eggs
2 teaspoons Vanilla extract
1 1/2 Cup Milk
1 1/2 Cup Hot Water
1/2 cup of Semisweet Chocolate Chips

Instructions:
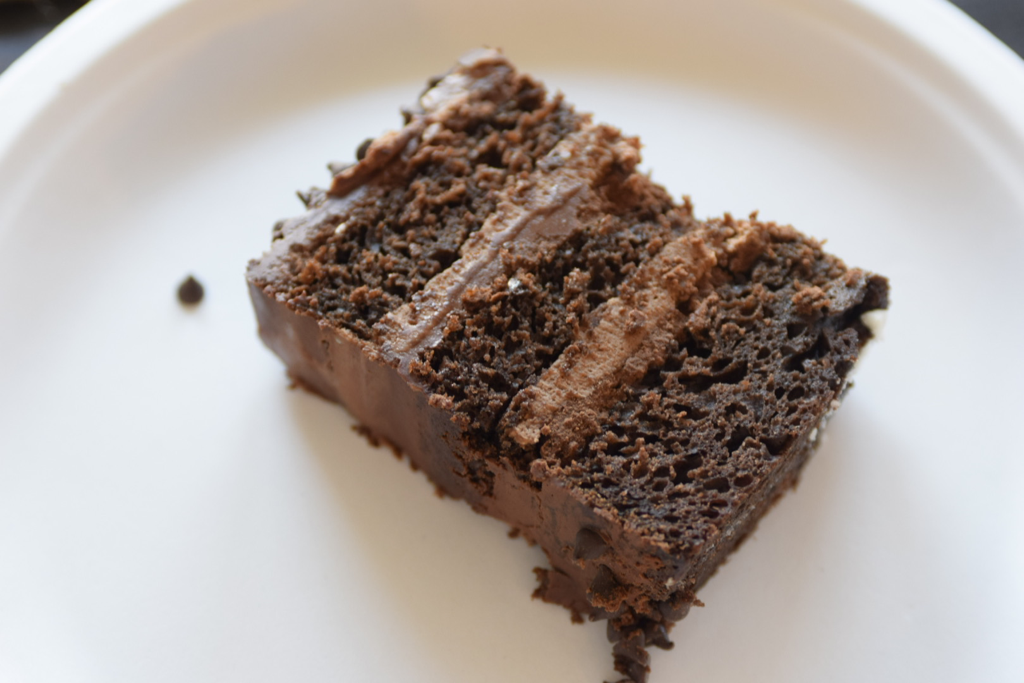
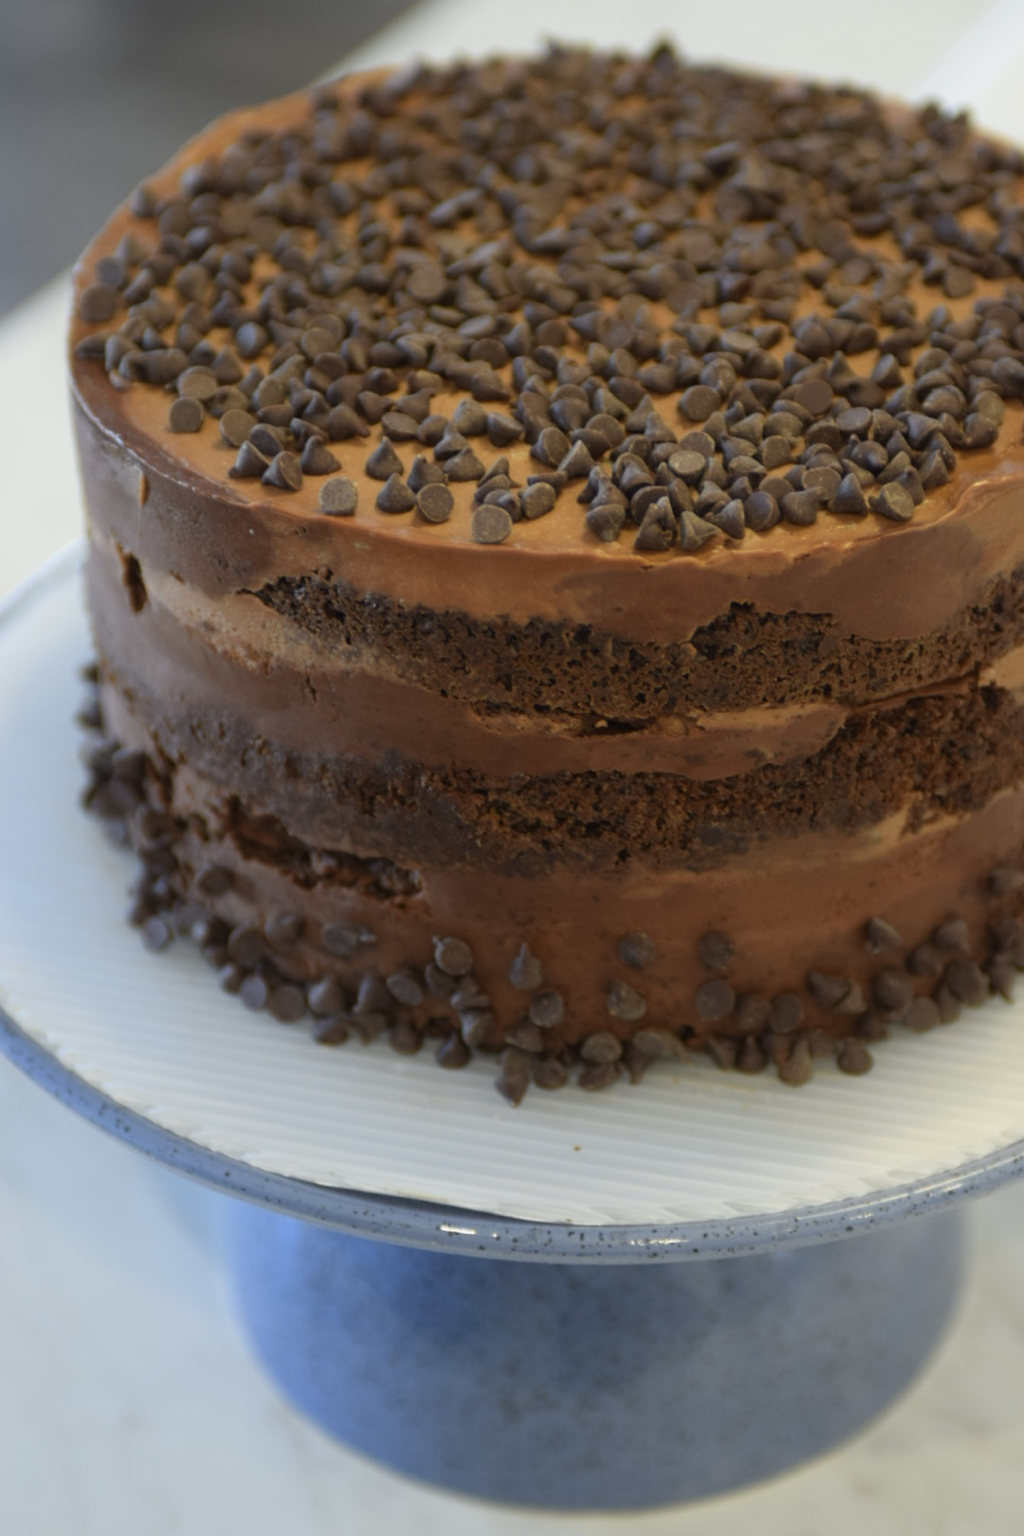

  1. Preheat oven to 325 F.
  2. In a stand mixer, whisk together Eggs, Milk, Oil, Water and Vanilla. Mix for 2-3 minutes on low/medium speed.
  3. In a separate bowl, mix the Flour, Sugar, Cocoa, Baking powder, Baking Soda, Salt and Chocolate Chips. Mix together until everything is incorporated.
  4. Lower the speed on the mixer to the lowest speed, and add in the dry ingredients to the wet ingredients. Mix on medium speed for 2-3 minutes.
  5. Turn off the mixer, and scrape the bowl.
  6. Mix ingredients for another 30-60 seconds.
  7. Prepare 3- 6” cake pans or 2- 8” cake pans with non-stick baking spray.
  8. Divide the batter evenly in the pans. Each pan should be about 1/2 way full. No more than that.
  9. Bake the cakes for 32-38 minutes (for the 6” pans), 45-48 minutes (for the 8” pans). Cakes will be firm to the touch, and will not sink in the center when fully baked. If the cake sinks or wiggles, the cake needs to bake for longer. Add 2-3 minutes at a time until fully baked.
  10. Once fully baked, remove cake pans from the oven, and set aside to cool. KEEP CAKES IN CAKE PANS. Do not remove from pans until cooled completely.
Picture

Chocolate Mousse 


​Ingredients: 
2 1/2 Cups Heavy Whipping Cream 
1 Cup Semi Sweet Chocolate
1 Tbsp E-Z Gel (Gelatin)
3/4 Cup Powdered Sugar
1 tsp Vanilla Extract
1/4 tsp Salt

Instructions:
  1. In a small/medium sauce pan, bring 1/2 Cup of Heavy Cream to a boil.
  2. Once the cream is boiling, turn off heat and pour over the Chocolate in a heat safe bowl. 
  3. Stir Cream and Chocolate together until fully combined. (This should take about 3-5 minutes).
  4. In a stand mixer, with a Whisk attachment, whip the remaining 2 Cups of Heavy Cream, Powdered Sugar, Salt Vanilla, and Gelatine at high speed until full stiff peaks. DO NOT OVER MIX.  
  5. Take bowl off of mixer, and gently fold in the chocolate ganache to the whipped cream. Mix until fully incorporated. 
  6. Chill until ready to use. 

Chocolate Ganache

INGREDIENTS:

1 Cup Heavy Cream
1.5 Cups Semi Sweet Chocolate
1 Tsp Vanilla extract


INSTRUCTIONS:
1. Boil the Heavy Cream in a small sauce pan
2. Once boiling, remove from heat.
3. Put your chocolate In a heat safe bowl or glass measuring cup.
4. Pour the hot heavy cream over the chocolate.
5. Mix until fully incorporated. (Should take 3-5 minutes).

Picture
6 Comments
Victoria Addington link
12/20/2022 12:07:05 pm

It was most captivating when you shared that Chocolate Mousse Cake is a must-try for chocolate lovers. Reading your post made me crave chocolate cake. I better look for a cake shop near my place to satisfy my craving.

Reply
Deb
1/3/2023 11:56:25 am

Ooh this looks so yummy! I’m going to try it!

Reply
Sharla Ash
1/3/2023 12:59:20 pm

I know it says E-Z Gel (Gelatin) if I can't get the e-z gel now can I just use unflavored gelatin bought in my grocery store?

Reply
Britt
1/4/2023 11:36:38 am

Let me know if you find out!

Reply
Yana
3/24/2023 01:25:07 pm

Made this cake few months ago and it’s now one of my favorite ones 💚

Reply
Angie
11/24/2023 05:09:03 am

What water? No water listed in ingredients, but in instructions only??

Reply


Leave a Reply.

    Hi, Im Whitney Berge

    Aka, The Blonde who Bakes,
    I am a wife and mom of 3, and a self- taught baker. I did not attend any formal culinary training, but I believe that nothing compares to learning as you go.
    Being in the kitchen baking is something that has always been special to me, and I knew that I could use my business knowledge as well as my baking experience to bless others with some delicious desserts, but also teach them that they can do it as well.
    About 15 years ago, I made the decision to not continue in my schooling for Sports Medicine and jumped in to selling my cakes and desserts.
    My clientele grew steadily, and I had some very loyal customers. So I made the decision to open up a brick and mortar bakery. 
    a few years into the bakery, I had my first child. Though it was difficult trying to navigate being a new mom and business owner, I pushed though and continued with my dream. 3 months later, I had a very big surprise that I was pregnant again with baby boy #2. This is when I had to re-evaluate and make the hard decision to close my bakery. Little did I know, that was the best decision I could have ever made. 

    1 year after closing my bakery doors, I wanted to get back to my passion for baking 
    I knew that I needed to change my business strategy because I wanted to be at home with my 2 boys, yet still be able to be Whitney and continue to grow as an entrepreneur. After many long nights of trying to figure out how I could change my business structure yet do what I love.
    I knew that I still wanted to bake desserts for people, but I wanted to focus a lot more of my energy on teaching others how to bake and create delicious and beautiful things. 

    ​And that my friends, is when The Blonde who Bakes came to be. 

    Archives

    February 2025
    November 2024
    March 2024
    February 2024
    December 2023
    November 2023
    October 2023
    September 2023
    May 2023
    April 2023
    March 2023
    January 2023
    October 2022
    March 2022
    October 2021
    September 2021
    August 2021
    July 2021
    March 2021
    February 2021

    Categories

    All
    Cookies

    RSS Feed

THE BLONDE WHO BAKES


Proudly powered by Weebly
  • HOME
  • SHOP
  • MENU
  • CATERING
  • CLASSES
  • RECIPES
  • Hi, Im Whitney
  • CONTACT US