THE BLONDE WHO BAKES
  • HOME
  • SHOP
  • MENU
  • CATERING
  • CLASSES
  • RECIPES
  • Hi, Im Whitney
  • CONTACT US

CHOCOLATE GANACHE

3/25/2022

0 Comments

 
INGREDIENTS:

1 Cup Heavy Cream
1.5 Cups Semi Sweet Chocolate
1 Tsp Vanilla extract

INSTRUCTIONS:
1. Boil the Heavy Cream in a small/medium sauce pan.
2. Once boiling, remove from heat.
3. Add your chocolate to the boiling cream. Let it sit for 2-3 minutes.
4. Mix until fully incorporated. (Should take 3-5 minutes). It should be a smooth, creamy finish.
0 Comments

CREAMY PEANUT BUTTER FROSTING

3/25/2022

1 Comment

 
Picture
This frosting is made for all of you Peanut Butter lovers out there. It’s something that you will be eating right out of the mixing bowl by the spoonful.

I use this frosting for a lot of yummy desserts, but mostly for my Chocolate Peanut Butter Cake. It is SO delicious and a must try if you are a chocolate pb fan.

​
INGREDIENTS:
2 C Soft, Unsalted Butter
1 1/2 C Creamy Peanut Butter
3 lbs Powdered Sugar
1 1/2 tsp Vanilla Extract
1 C - 1 1/2 C Heavy Cream

​
Instructions: 
  1. In a stand mixer, use your paddle attachment and cream your butter. Mix on medium/high speed for 2-3 minutes. Or until creamy. (Make sure there are no clumps) 
  2. Once creamy, add in peanut butter. Mix until fully incorporated.
  3. Turn mixer down to low speed and add in your vanilla extract
  4. Add in all of your powdered sugar, let mix for about 1 minute. 
  5. Scrape down bowl to make sure everything is incorporated. 
  6. Add in your heavy cream and mix for about 5 minutes or until creamy. (Add cream AS NEEDED. Don’t use all of it if you don’t need it. Too much cream will make your frosting runny) 
  7. Once fully mixed, take off stand mixer and mix your frosting with a wooden spoon and get out any extra air pockets and create a smooth creamy finish. 
1 Comment

Super moist Chocolate Cake

3/25/2022

14 Comments

 
INGREDIENTS: 
  • 3 cups all-purpose flour
  • 3 cups granulated sugar
  • 1 1/2 cups unsweetened cocoa powder
  • 1 tablespoon baking soda
  • 1 1/2 teaspoons baking powder
  • 1 1/2 teaspoons salt
  • 4 large eggs
  • 1 1/2 cups buttermilk
  • 1 1/2 cups warm water
  • 1/2 cup vegetable oil
  • 2 teaspoons vanilla extract


​
INSTRUCTIONS:

  • Preheat oven to 350 degrees Fahrenheit.
  • Prepare pans with butter or non stick spray. 
  • Mix together flour, sugar, cocoa, baking soda, baking powder, and salt in a stand mixer using a low speed until combined.
  • Add eggs, buttermilk, warm water, oil, and vanilla. Beat on a medium speed until smooth. This should take just a couple of minutes.
  • Divide batter among the three pans.
  • Bake for 30-35 minutes in a 350 degree oven until a toothpick inserted into the center comes out clean.
  • Cool for 15-20 minutes and then place cakes on cake board and remove the cake pan.
  • Place cake layers in freezer, let cool for 3-5 hours. Once solid, fill and decorate. 
  • Enjoy! 
14 Comments

Vanilla Buttercream Frosting

10/16/2021

10 Comments

 
This is my favorite buttercream frosting recipe! I use it daily. And to make this frosting even better, you can use this frosting as a base for any flavor of frosting you’re making. So you can add a ganache to make a chocolate frosting. Lemon extract and yellow color to make a fresh lemon, or peppermint for a mint frosting.. the possibilities are endless!!!! So go give this frosting a try and let me know what you think!!
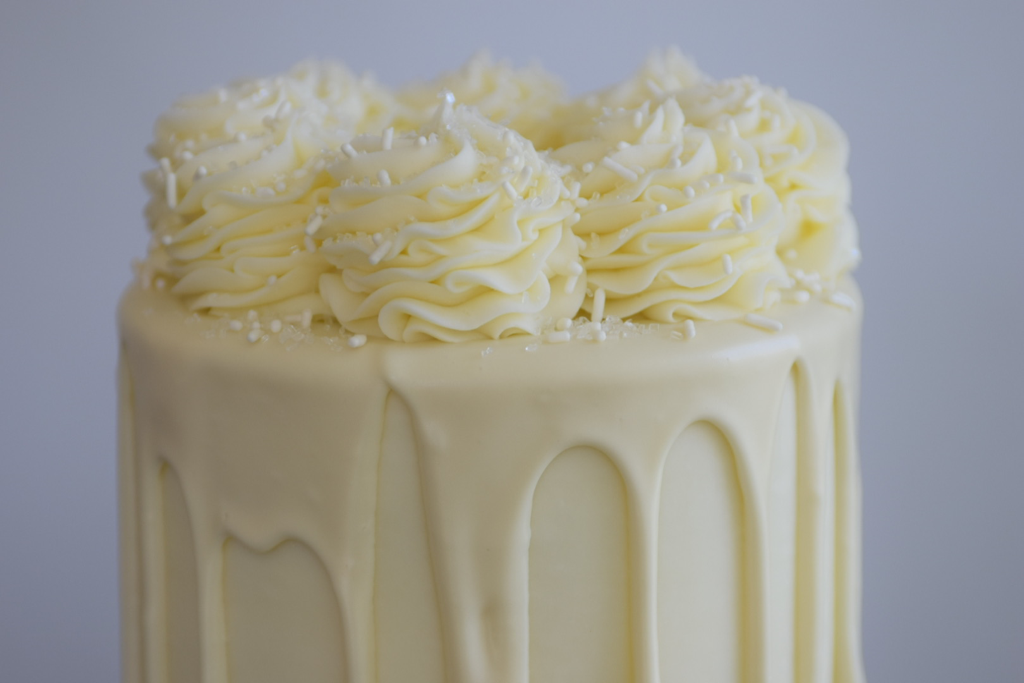
Picture

Vanilla Buttercream Recipe

Ingredients:

2 Cups Soft Room Temperature, UnSalted Butter
7-8 Cups Powdered Sugar
1 1/2 tsp CLEAR Vanilla Extract
1/2-1 C Heavy Cream


INSTRUCTIONS:
  1. In a stand mixer, use your paddle attachment and cream your butter. Mix on medium/high speed for 2-3 minutes. Or until silky and creamy. (There should be no clumps. If there is, mix for longer on high speed.)
  2. Turn mixer down to low speed and add in your vanilla. Mix for 45-60 seconds.
  3. While your mixer is on the lowest speed, Add in your full measurements of Powdered sugar. Mix for 1 minute on low.
  4. Add in your heavy cream in small 1/4 cup increments. After 1-2 measurements of cream, the powdered sugar should start incorporating. Once it does, turn mixer speed up to medium high speed. Continue to add in small increments of cream until you’ve reached your desired frosting consistency.
  5. Once fully mixed, take off stand mixer and mix your frosting with a wooden spoon and get out any extra air pockets and create a smooth creamy finish.
    ​
Picture
Enjoy!!!!

TAG US IN YOUR CREATIONS!

INSTAGRAM & TIKTOK- @theblondewhobakes
10 Comments

Classic Chocolate Cake

10/14/2021

8 Comments


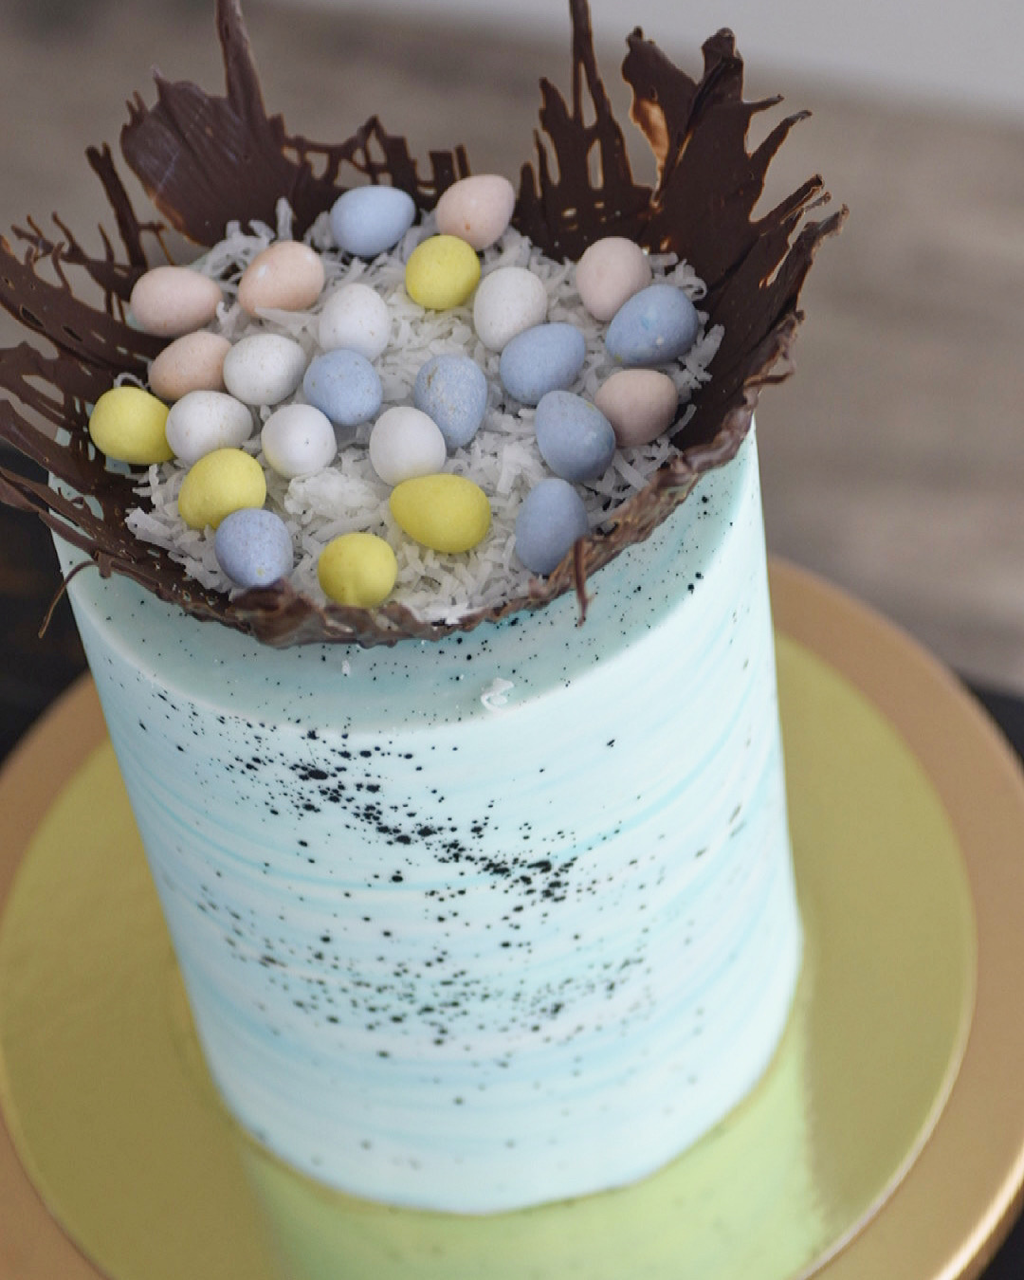
Chocolate Cake Recipe

Bake Temp: 350°F
Bake Time: 28-32 minutes for 6” cake
35-40 minutes for 8” cake

Ingredients

2 1/2 cups of all purpose flour
2 1/2 teaspoons of baking powder
1/2 teaspoon of baking soda
1 cup cocoa powder
1 teaspoon salt
1/2 cup vegetable oil
2 cups granulated sugar
3 large eggs (egglands best)
2 teaspoons vanilla extract
1/2 teaspoon almond extract
2 1/2 cups milk
1/2 cup of Semisweet Chocolate Chips

Baking Instructions:

Preheat oven to 350°F
Prepare cake pans with non stick spray. (My favorite brand is “BAKERS JOY”. You can find it at any grocery store in the baking isle). Set aside.

Sift together flour, cocoa powder, baking soda, baking powder, and salt.

In the bowl of a stand mixer, beat together oil and sugar on medium speed. Once mixed, add in the eggs, and vanilla.

Scrape bowl before moving on to next steps.

Turn the mixer on and slow speed and add in your dry ingredients. Once you have all of your dry ingredients mixed in add in the milk and the chocolate chips.
Mix on medium speed for about one minute or until combined.

Divide the batter between your baking pans.
Fill your pans about 1/2-3/4 full.
**DO NOT FILL TO THE RIM**

Bake cakes for about 28-40 minutes (depending on cake size) or until your cake is full, and holds its shape after you touch it.

Let your cake cool for about 20 minutes IN CAKE PAN.
Once cooled, cut the top off your cake put your cake on a cake board, and place the cake in the freezer for about 3 to 5 hours.


Once your cake is frozen and stiff, you can start filling it with your frosting.

Layer your cake and fill with about 1-1 1/2 Cups of frosting per layer.

Crumb coat your cake.

Put in freezer for about 30 minutes.

Put on final layer of frosting, and decorate how you prefer.
Picture
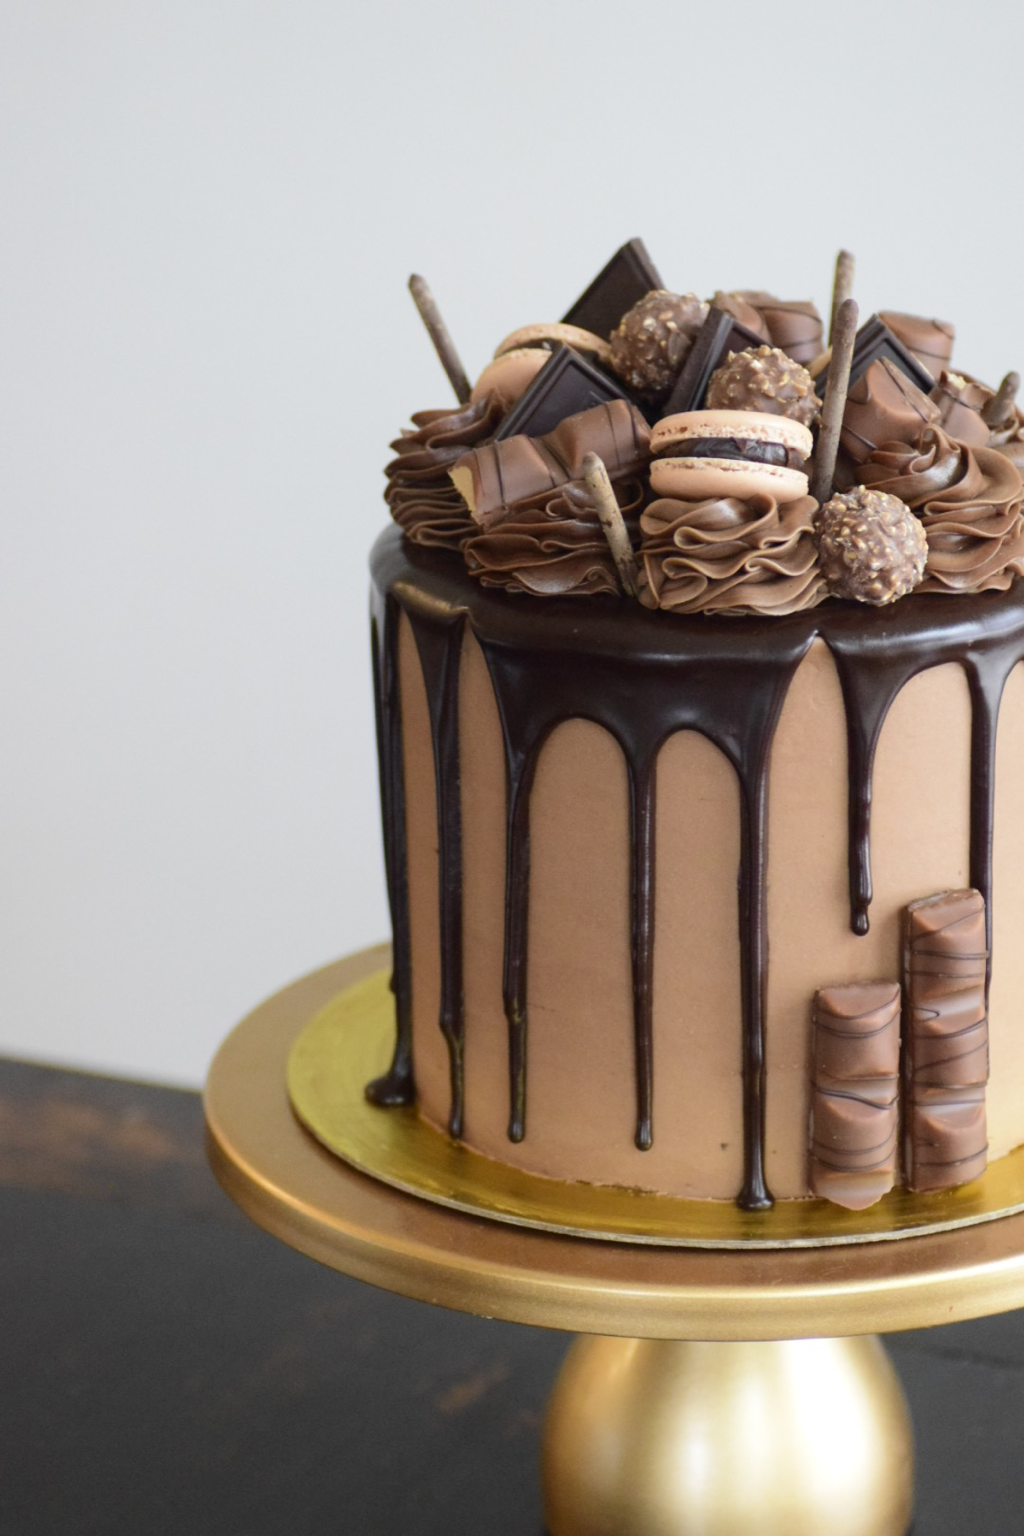
Now go bake a cake and enjoy it!!!!

​
TAG ME IN YOUR WORK!

I’d love to see it and spotlight you and your beautiful creations.
YOU CAN FIND ME ON INSTAGRAM & TIKTOK
@theblondewhobakes #theblondewhobakes
8 Comments

Best Banana Bread

9/17/2021

7 Comments

 
Picture
I have always loved banana bread. And so when my mom passed down her banana bread recipe to me when I got married I could not wait to share it with my own family.
And so naturally, because I love this recipe so much, I had to share with you guys. Enough talking, let’s get to the real reason you’re here…. The recipe.
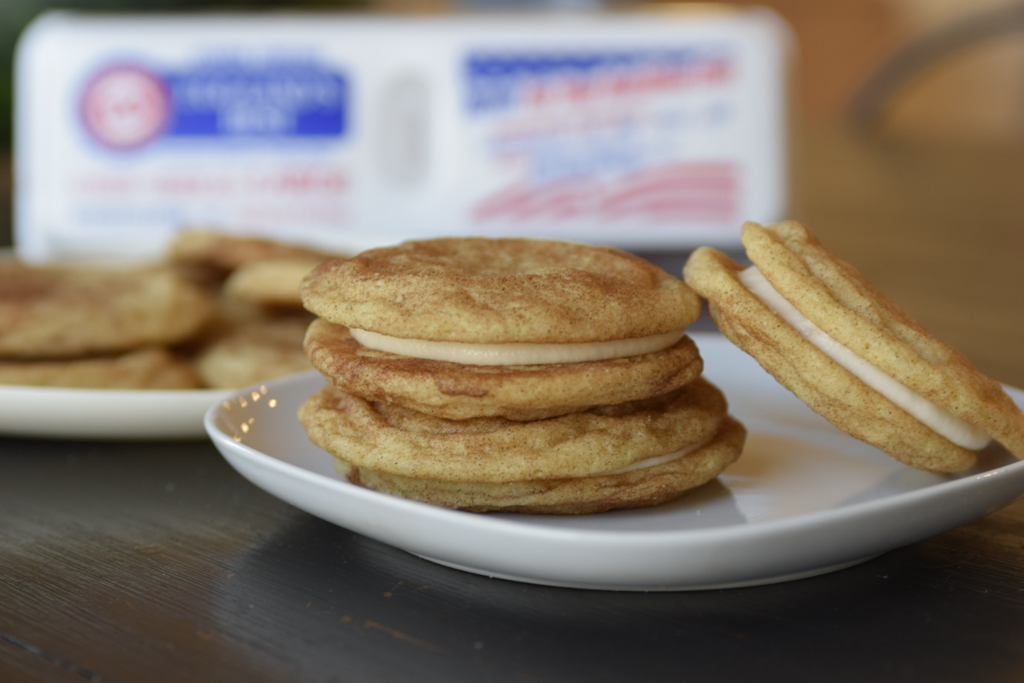
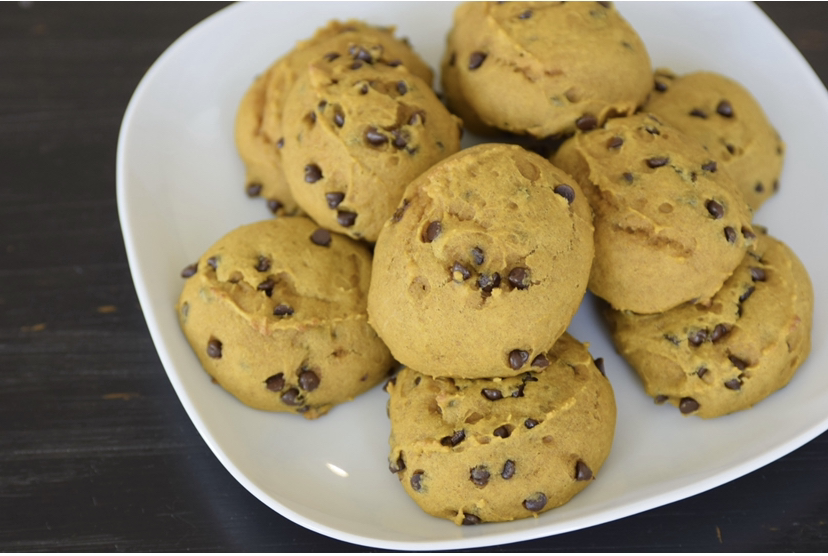
​

Read More
7 Comments

PUMPKIN CHOCOLATE CHIP COOKIES

9/6/2021

3 Comments

 
Picture
Pumpkin Chocolate Chip Cookies have been and will forever be one of my all time favorites. I’m a sucker for a super soft pumpkin cookie.

These cookies are absolutely delicious as a standard size cookie, or to make them even sweeter, make them Bite-Sized! I must warn you, that if you end up making them Mini…. They are super dangerous because they are just too easy to eat them. So now that you have that warning, let’s get to the recipe!


Read More
3 Comments

MAPLEDOODLES

8/30/2021

2 Comments

 
Picture
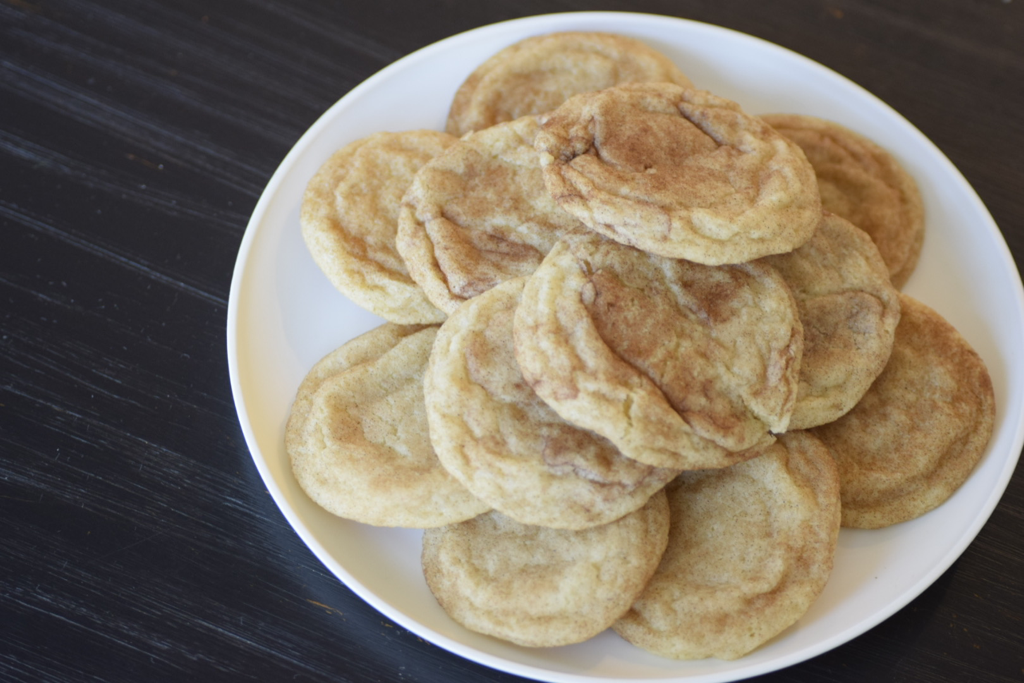
🍁I’ve always loved snickerdoodle cookies because they remind me of growing up, my mom would bake them for me and my brothers on Sunday’s. So this past Sunday I decided to let the kids help me make some of my new favorite cookies. Mapledoodles! 🍁
This is a Snickerdoodle + Maple Frosting Filling. (So easy & delicious!!) This is such a delicious treat, but is definitely a new fall favorite at our house. Im very excited to finally share my recipe for this yummy treat.

Mapledoodles (snickerdoodle + maple filling)


Ingredients:


1 Cup (2 sticks)- soft, unsalted butter
1 1/2 Cup- Granulated Sugar
1 tsp Vanilla extract


2 Lg Eggs


2 3/4 Cup All Purpose Flour
1 1/2 tsp Cream of Tartar
1/2 tsp baking soda
1 tsp salt


In a separate bowl:
1/4 Cup Sugar
1 1/2 Tbsp Cinnamon


Baking Instructions:


-Preheat oven to 350°F.
-Prep baking sheets with parchment paper or silicone mats.
-In a mixer, mix butter and sugar for about 1-2 minutes.
-Add in vanilla and eggs. Mix for another 1 minute.
-Stop mixer. Scrape bowl to make sure thy everything is combined well.
-Slow mixer, and add in flour, baking soda, cream of Tartar, and salt.
-mix well until the dough forms.
-Stop mixer.
-Roll into small bite sized balls, roll in cinnamon & sugar mixture.
-Put the dough balls on a plate and refrigerate for about 30 minutes.
-Once 30 minutes is up, place about 6 balls on a baking sheet, and bake for 9-11 minutes at 350°F.


-Let cool for about 15-20 minutes and then enjoy!!!

MAPLE BUTTERCREAM
frosting

Ingredients:
1 C Very Soft, UnSalted Butter
5 C Powdered Sugar
1 1/2 tsp CLEAR Vanilla Extract
2 tsp Maple Extract
1/2-1 C Heavy Cream
2 Tbsp Maple Syrup


Instructions:
  1. In a stand mixer, use your paddle attachment and cream your butter. Mix on medium/high speed for 2-3 minutes. Or until creamy (like a creamy PB consistency)
  2. Turn mixer down to low speed and add in your flavors and powdered sugar.
  3. Scrape down bowl to make sure everything is incorporated.
  4. Add in your heavy cream and mix for about 5 minutes or until creamy.
  5. Once fully mixed, take off stand mixer and mix your frosting with a wooden spoon and get out any extra air pockets and create a smooth creamy finish.
Picture
2 Comments

Super Moist Vanilla Cake

8/14/2021

8 Comments

 
This has been one of my most requested recipes, and I thought that now would be a great time to share it. 

This cake recipe is the base of all of my cakes. that I make. Meaning, I make this cake recipe, and just add to it to create new flavors. It is a very simple recipe, easy to follow and always turns out super yummy. So give it a try and let me know what you think!

​

Super moist Vanilla Cake Recipe
​By: The Blonde who Bakes

Ingredients:

  • 2 1/2 Cups All Purpose Flour
  • 2 1/2 tsp Baking Powder
  • 1 tsp Salt
  • 1 1/2 Cups granulated sugar
  • 1 C Unsalted Room Temp Butter
  • 3 Large Eggs
  • 1 Tbsp Vanilla Extract
  • 1 tsp Almond Extract
  • 1 C Milk

Instructions:

  1. Preheat oven to 350 F
  2. Prepare baking pans by spraying the entire pan with non stick spray or butter. This recipe is enough for 2- 8" Cake pans or 4- 6" cake pans 
  3. In a large bowl, measure out: flour, baking powder and salt into a bowl. Whisk and set it aside. 
  4. In a stand mixer, Cream the butter and sugar together with a whisk attachment until creamy. (2-3 minutes on medium/high).
  5. Slow your mixer down and add in your Eggs, and flavour extracts.
  6. Stop mixer, scrape down bowl with a rubber spatula.
  7. Put mixer on slow speed, and add in your dry ingredients from the large bowl.
  8. Add your milk into the batter. Mix on medium speed until everything is incorporated. 
  9. Turn your mixer off, and detach your bowl from the mixer. 
  10. Divide your batter evenly into your prepared baking pans. ( I like to fill my pans about 1/2 way full. Nothing above the half way mark. This will help your cake to not overflow while baking)
  11. Bake your cakes at 350F. (8' cake for 30-32 minutes) (6" cake for 28-30 minutes).
  12. Once your cakes are done baking, let them cool IN THE PANS on a baking rack for about 10-20 minutes. 
  13. Once cooled, cut off the rounded cake top while in the pan. Place a cake board on top and flip over. Remove the cake pan. And place your single cake layers in the freezer to set and firm up. 
  14. Let the cake layers freeze for about 3-5 hours and then fill yo0ur cake and decorate. 
ENJOY!!!!!
8 Comments

Whit's Favorite Chocolate Chip Cookies

7/9/2021

3 Comments

 
Picture
I’m a sucker for a really good soft chewy chocolate chip cookie. I’ve been baking for so many years that I’ve been able to test and try hundreds if not, thousands of different cookie recipes. This one will always be my all-time favorite chocolate chip cookie recipe. Not only is this recipe absolutely delicious as a standard sized cookie, but it also makes a delicious bite-size treat.

Read More
3 Comments
<<Previous
Forward>>

    Hi, Im Whitney Berge

    Aka, The Blonde who Bakes,
    I am a wife and mom of 3, and a self- taught baker. I did not attend any formal culinary training, but I believe that nothing compares to learning as you go.
    Being in the kitchen baking is something that has always been special to me, and I knew that I could use my business knowledge as well as my baking experience to bless others with some delicious desserts, but also teach them that they can do it as well.
    About 15 years ago, I made the decision to not continue in my schooling for Sports Medicine and jumped in to selling my cakes and desserts.
    My clientele grew steadily, and I had some very loyal customers. So I made the decision to open up a brick and mortar bakery. 
    a few years into the bakery, I had my first child. Though it was difficult trying to navigate being a new mom and business owner, I pushed though and continued with my dream. 3 months later, I had a very big surprise that I was pregnant again with baby boy #2. This is when I had to re-evaluate and make the hard decision to close my bakery. Little did I know, that was the best decision I could have ever made. 

    1 year after closing my bakery doors, I wanted to get back to my passion for baking 
    I knew that I needed to change my business strategy because I wanted to be at home with my 2 boys, yet still be able to be Whitney and continue to grow as an entrepreneur. After many long nights of trying to figure out how I could change my business structure yet do what I love.
    I knew that I still wanted to bake desserts for people, but I wanted to focus a lot more of my energy on teaching others how to bake and create delicious and beautiful things. 

    ​And that my friends, is when The Blonde who Bakes came to be. 

    Archives

    June 2025
    February 2025
    November 2024
    March 2024
    February 2024
    December 2023
    November 2023
    October 2023
    September 2023
    May 2023
    April 2023
    March 2023
    January 2023
    October 2022
    March 2022
    October 2021
    September 2021
    August 2021
    July 2021
    March 2021
    February 2021

    Categories

    All
    Cookies

    RSS Feed

THE BLONDE WHO BAKES


Proudly powered by Weebly
  • HOME
  • SHOP
  • MENU
  • CATERING
  • CLASSES
  • RECIPES
  • Hi, Im Whitney
  • CONTACT US