THE BLONDE WHO BAKES
  • HOME
  • SHOP
  • MENU
  • CLASSES
  • CONTACT US
  • RECIPES
  • Hi, Im Whitney

Fudgy Brownies

1/28/2023

1 Comment

 
Brownies were the first thing I ever made in the kitchen with my mom and grandma over 30 years ago now. Back then, it was a simple brownie box mix to keep it simple for me, but I just remember that every Sunday, we would always make brownies and that was my job. It was something I always looked forward to, and when I was finished mixing the batter I would purposefully “forget” to put all of the batter in the pan to bake… I would save myself some extra batter to lick off the spoon and that was almost better than eating the fully baked brownies.
Today, they are still one of my favorite things to make and eat. My 3 kids now help me in my kitchen, and lick the spoon just like I used to so many years ago when I was growing up.

I am sharing my favorite fudgy/chewy brownie recipe.
This is a very decadent chocolate taste, and will definitely give you a chocolate fix if that’s what you’re going for.

Fudgy Brownie Recipe

Picture
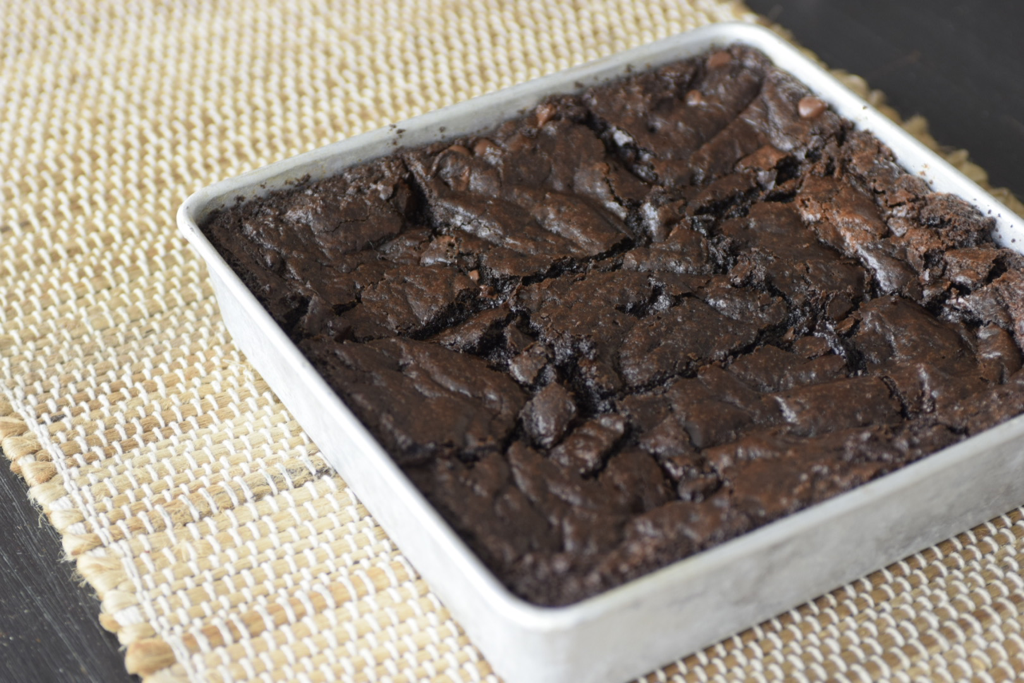
Bake Temp: 350 F
Bake Time: 30-35 minutes


Ingredients
3/4 cup unsalted butter
4 ounce semi-sweet chocolate
2 cups granulated sugar*
3 large eggs, room temp
2 teaspoons pure vanilla extract
1 cup unsweetened dutch-process cocoa powder
1 cup all-purpose flour
1 teaspoon salt
optional: 1 and 1/4 cups semi-sweet chocolate chips
Instructions:
-Preheat the oven to 350°F and grease pan.
-In a microwave safe bowl, combine the butter and 2 ounces of chocolate. Melt in 30 second increments, whisking after each, until completely smooth.
-Whisk in the sugar until completely combined, then whisk in the eggs and vanilla.
-Add the cocoa powder, flour, salt, remaining 2 ounces of chocolate and the chocolate chips. -Fold it all together with a rubber spatula. Batter will be very thick. Spread evenly into prepared pan.
-Bake for 30-35 minutes. You can check to see if your brownies are done by sticking a toothpick or knife thru the center of the baked brownies. If it comes out clean, they are done. If it comes out with batter, add a few minutes to the bake time.
-Let them cool, and enjoy!
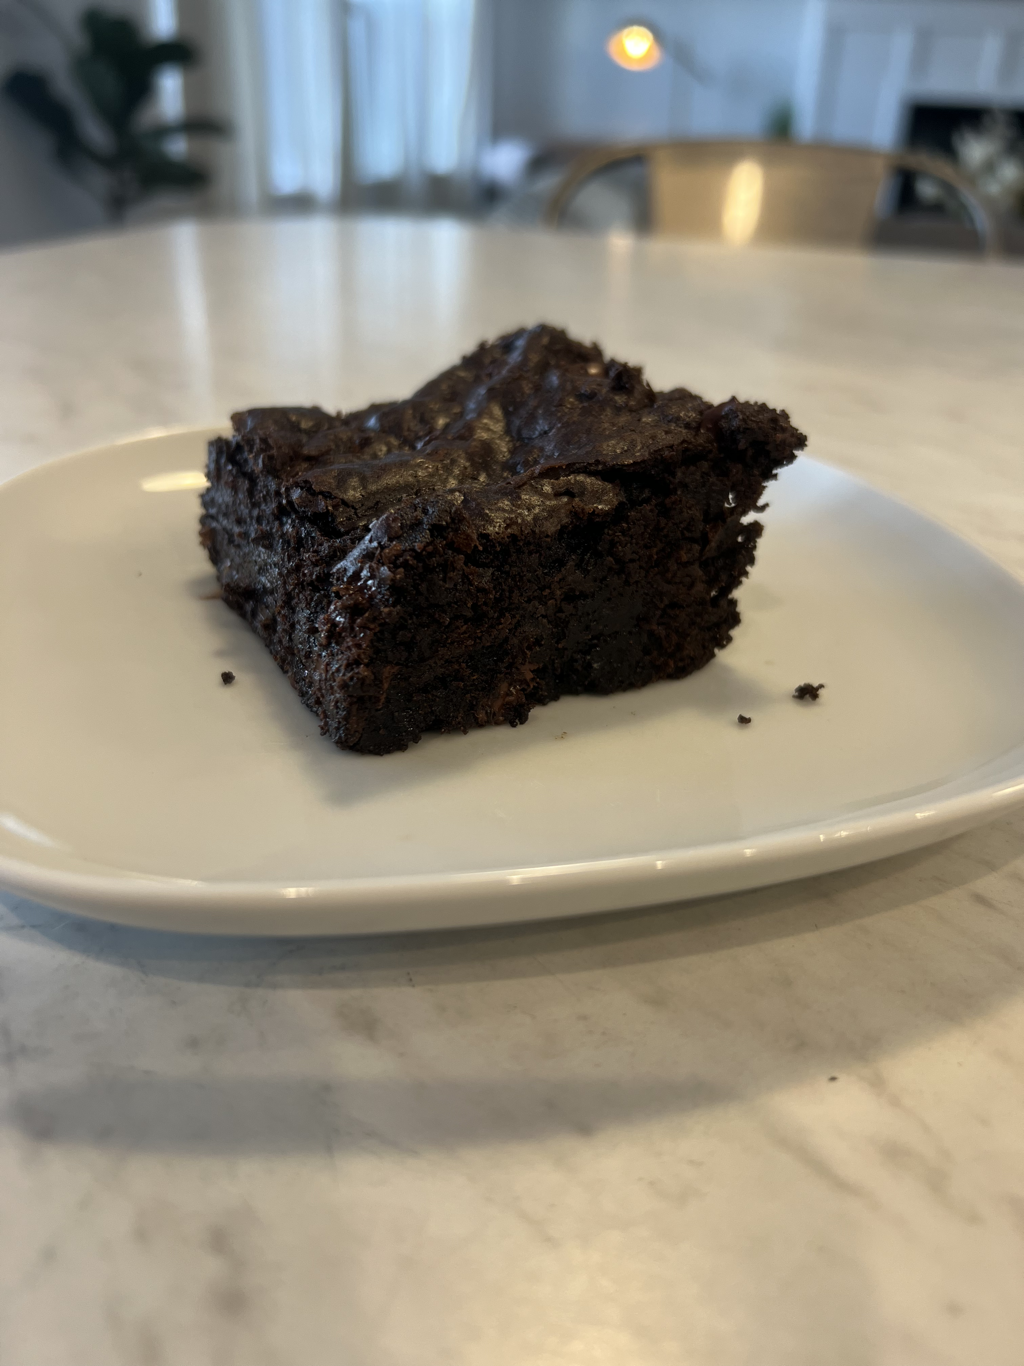
Picture
1 Comment

Whitney’s Favorite Vanilla Cake

1/26/2023

4 Comments

 
Picture

Vanilla Cake Recipe
By: The Blonde who Bakes


Ingredients:
3 Cups Cake Flour (I used Lehi mills Cake flour)
1 1/2 tsp Baking Powder
1 tsp Salt
1 Cup Butter, room temperature
2 Cups Granulated Sugar
4 Eggs
2 Egg Whites
1/2 Cup Vegetable Oil
1 tbsp Vanilla extract
1/3 Cup Greek Vanilla yogurt or Sour Cream

1 Cup Milk


Tools needed:
Electric Mixer or Large Bowls
Whisk
Oven
Baking spray
3 Cake Pans (6” cake pans or 2 - 8” pans)
Baking Instructions:


-Preheat your oven to 325 degrees F.

-Prepare three 6” round cake pans OR two 8” pans with non-stick spray Spray again. Set aside. (I highly recommend the “Bakers Spray” or “PAM Baking Spray with flour”.)

-In a medium sized mixing bowl, whisk together the cake flour, baking powder and salt. Set aside.

-In the bowl of an electric mixer, fitted with the paddle attachment, cream the butter and the sugar for 3 to 5 minutes on medium-high speed.

-The mixture should be light and fluffy. Scrape down the sides of the bowl and begin to add the eggs and egg whites on medium speed, scraping down the sides and bottom of the bowl between addition, continue beating on medium-high speed until the texture is smooth and the volume is nearly doubled, about 3 to 5 minutes.Add the vanilla extract and mix until incorporated.

-Add the the full Measurement of the vegetable oil. Mix well and incorporate.

-Add in the Greek Vanilla yogurt OR sour cream. Mix well.

-Slow the mixer down as much as possible, add then in 1/2 of the of flour mixture,

-Add 1/2 of the milk. Let mix for 40-60 seconds.

-Add in the final measurements of flour and milk. Let mix until fully incorporated. 2-3 minutes. The batter should be smooth.


-Pour cake batter into each of the prepared three 6”cake pans. Or 2 8” pans. Level out all the batter in each pan.

-Place in over to bake at 325°F for 32-36 minutes.

-To check doneness, you can touch the top of the cake very lightly. If it stays firm and holds it shaped, almost bounces back, your cake is done.

-You can also insert a toothpick into the center of the cake. If comes out with a few moist crumbs on it. Let cool in the pans for about 15-20 minutes and then remove from cake plans and place cake on cake board.

-Place cake layers in the freezer for 4-6 hours.

-After cold and solid, it’s time to decorate!


4 Comments

    Hi, Im Whitney Berge

    Aka, The Blonde who Bakes,I am a wife and mom of 3, and a self- taught baker. I did not attend any formal culinary training, but I believe that nothing compares to learning as you go.
    Being in the kitchen baking is something that has always been special to me, and I knew that I could use my business knowledge as well as my baking experience to bless others with some delicious desserts, but also teach them that they can do it as well.
    about 15 years ago, I made the decision to not continue in my schooling for Sports Medicine and jumped in to selling my cakes and desserts.
    My clientele grew steadily, and I had some very loyal customers. So I made the decision to open up a brick and mortar bakery. 
    a few years into the bakery, I had my first child. Though it was difficult trying to navigate being a new mom and business owner, I pushed though and continued with my dream. 3 months later, I had a very big surprise that I was pregnant again with baby boy #2. This is when I had to re-evaluate and make the hard decision to close my bakery. Little did I know, that was the best decision I could have ever made. 

    1 year after closing my bakery doors, I wanted to get back to my passion for baking 
    I knew that I needed to change my business strategy because I wanted to be at home with my 2 boys, yet still be able to be Whitney and continue to grow as an entrepreneur. After many long nights of trying to figure out how I could change my business structure yet do what I love.
    I knew that I still wanted to bake desserts for people, but I wanted to focus a lot more of my energy on teaching others how to bake and create delicious and beautiful things. 

    ​And that my friends, is when The Blonde who Bakes came to be. 

    Archives

    March 2023
    January 2023
    October 2022
    March 2022
    October 2021
    September 2021
    August 2021
    July 2021
    March 2021
    February 2021

    Categories

    All
    Cookies

    RSS Feed

THE BLONDE WHO BAKES


Proudly powered by Weebly
  • HOME
  • SHOP
  • MENU
  • CLASSES
  • CONTACT US
  • RECIPES
  • Hi, Im Whitney